How to Make Gelato at Home (2026): The Authentic Italian Method for Beginners
DIY Gelato Recipe: Step-by-Step Guide for Beginners. If you have ever stood in front of a gelateria case in Italy — or even at a specialty shop in the United States — and thought about how to make gelato at home, you are not alone. Gelato has moved far beyond the walls of Italian pasticcerie and into the everyday ambitions of home cooks across America. What was once considered an artisan product requiring professional equipment is now entirely achievable in a home kitchen, with tools most of us already own.
Interest in authentic Italian cooking has grown dramatically in the United States over the past decade. According to the National Restaurant Association, Italian food consistently ranks among the top three most popular cuisines in the country, and home cooks increasingly seek the real thing — not the americanized version. Gelato, in particular, has seen a surge of interest as a more flavorful, less fatty alternative to traditional ice cream, with specialty gelato shops growing at a double-digit rate in American urban markets since 2020.
We have spent years studying and recreating authentic Italian gelato recipes, testing dozens of variations across different base types, flavor profiles, and techniques. We have worked through the common failures — icy textures, bland flavors, grainy results — and we know exactly where beginners go wrong and how to avoid those mistakes from the first batch. The difference between mediocre homemade gelato and something that genuinely rivals what you would find in Florence comes down to a small number of principles, all of which are teachable.
In this guide, you will learn the fundamental differences between gelato and ice cream, understand the science behind gelato’s signature texture, follow a complete step-by-step recipe for classic fior di latte gelato, and get actionable guidance for making a range of flavors from pistachio to lemon sorbetto. Whether you own an ice cream machine or not, this guide has you covered.

What Makes Gelato Different from Ice Cream
Before learning how to make gelato at home, it is worth understanding what makes it fundamentally different from American ice cream. The distinction is not just cultural — it is chemical and physical, and it explains why gelato tastes more intensely flavored despite containing less fat.
The Role of Fat and Air
American ice cream is typically made with heavy cream as its primary dairy component, resulting in a fat content between 10% and 18%. Gelato, by contrast, uses whole milk as its base, keeping fat content between 4% and 8%. This lower fat content has an important consequence: fat molecules coat the palate and suppress flavor perception. With less fat in gelato, the flavors of pistachio, chocolate, or lemon hit your taste receptors more directly and more powerfully.
The second major difference is overrun — the amount of air incorporated during churning. Ice cream is churned quickly and aggressively, incorporating 50% to 100% air by volume. Gelato is churned slowly, keeping air content between 20% and 35%. The result is a denser, heavier product. A pint of gelato literally weighs more than a pint of ice cream of the same volume, which is why quality gelato always feels more substantial.
Temperature and Texture
Authentic gelato is served at a warmer temperature than ice cream — typically between 10°F and 22°F (-12 to -6°C), compared to ice cream’s 0°F to 10°F (-18 to -12°C). This warmer serving temperature is not incidental — it is essential to the texture. At this temperature, gelato remains pliable, silky, and easy to scoop with a flat spatula (the traditional gelato paddle), rather than the rounded scoop used for ice cream.
| Criterion | Authentic Gelato | American Ice Cream |
| Fat content | 4–8% (milk-based) | 10–18% (cream-based) |
| Air content (overrun) | 20–35% | 50–100% |
| Serving temperature | 10–22°F (-12 to -6°C) | 0–10°F (-18 to -12°C) |
| Texture | Dense, silky, smooth | Light, fluffy, airy |
| Flavor intensity | Very high — bolder taste | Milder — fat mutes flavor |
| Churning speed | Slow (less air) | Fast (more air) |
| Shelf life (homemade) | 3–5 days optimal | Up to 2 weeks |
💡 Practical Tip: The most common mistake beginners make is storing homemade gelato at regular ice cream temperature — around 0°F. This makes it rock-hard and icy. Set your freezer slightly warmer or allow gelato to temper at room temperature for 5 to 8 minutes before serving.
Essential Equipment for Making Gelato at Home
One of the most frequently asked questions about homemade gelato is whether you need an ice cream machine. The short answer is: it helps significantly, but it is not strictly required. Here is what you need to know about equipment before you start.
With an Ice Cream Machine
A standard home ice cream maker — either a compressor model or a pre-frozen bowl model — produces the best results for homemade gelato. The slow churning action incorporates the right amount of air while preventing large ice crystals from forming. Most machines churn for 20 to 30 minutes, which is sufficient for gelato if the base has been properly chilled beforehand.
The key difference when using a machine for gelato versus ice cream is churn time. For gelato, stop the machine earlier than you would for ice cream — the moment the mixture reaches a soft, creamy consistency rather than the fluffy, whipped texture of ice cream. Over-churning adds too much air and undermines the density that defines authentic gelato.
Without an Ice Cream Machine
Gelato can be made without a machine using the still-freezing method. Pour your prepared base into a shallow metal container, place it in the freezer, and stir vigorously every 30 minutes for 2 to 3 hours. Each round of stirring breaks up ice crystals and introduces controlled air. The result is slightly less smooth than machine-churned gelato but still genuinely good — and entirely respectable for a first attempt.
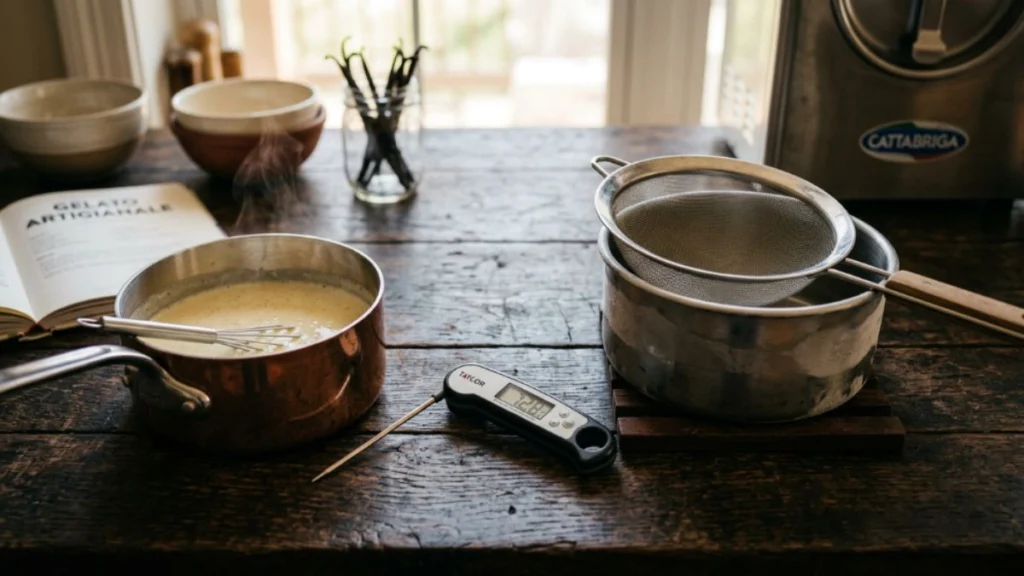
The Tools You Actually Need
- A heavy-bottomed saucepan — essential for heating the milk base evenly without scorching
- A digital thermometer — critical for monitoring temperature precisely (180°F/82°C is the target for pasteurizing the base)
- A fine-mesh strainer — removes any cooked egg bits or undissolved sugar
- A high-speed blender or immersion blender — for emulsifying and smoothing the base before churning
- A shallow metal container with a tight-fitting lid — for freezing and storing the finished gelato
- A flat gelato spatula — for serving in the traditional Italian style
⚠️ Attention: Avoid glass or ceramic containers for freezing gelato. Metal conducts cold more efficiently, freezes the gelato more evenly, and prevents the temperature fluctuations that cause unwanted ice crystal formation.
The Core Ingredients: What Authentic Gelato Is Made Of
The quality of your gelato is determined almost entirely by the quality of your ingredients. Authentic Italian gelato uses a short, clean ingredient list — which means there is nowhere to hide a substandard component. Here is what each ingredient does and how to choose it well.
Whole Milk
Whole milk is the backbone of classic gelato. Do not substitute with reduced-fat, plant-based, or ultra-pasteurized milk. Ultra-pasteurized milk, in particular, behaves differently when heated — the proteins are already denatured, which affects emulsification and the final texture. Look for regular pasteurized whole milk from a quality brand. For especially rich results, use milk from a local dairy.
Sugar
Standard granulated white sugar is used in most authentic recipes. Beyond sweetness, sugar is a functional ingredient — it lowers the freezing point of the mixture, which is one of the primary reasons gelato remains scoopable at freezer temperatures rather than turning to a solid block. The ratio matters: too little sugar and the gelato freezes too hard; too much and it becomes soft and syrupy. We use 150 to 180 grams of sugar per liter of milk as a baseline.
Egg Yolks (for custard-based gelato)
Not all gelato contains eggs. Milk-based gelato (bianco, pistachio, fior di latte) typically does not. Egg yolks appear in custard-based flavors like zabaglione or tiramisu gelato, where they add richness and a deeper golden color. When using eggs, cook the mixture to 180°F (82°C) to pasteurize safely.
Flavor Ingredients
This is where authenticity matters most. Use pure pistachio paste, not pistachio flavoring. Use real espresso, not instant coffee. Use fresh lemon juice and zest, not lemon extract. The difference in flavor between a gelato made with genuine pistachio paste and one made with artificial flavoring is the difference between an Italian gelateria and a gas station freezer. It is not subtle.
✓ Best Practice: Source pure nut pastes from Italian specialty suppliers or well-stocked online retailers. Brands that supply professional gelato makers — such as Agrimontana or Comprital — are available in the US and produce dramatically better results than domestic supermarket alternatives.
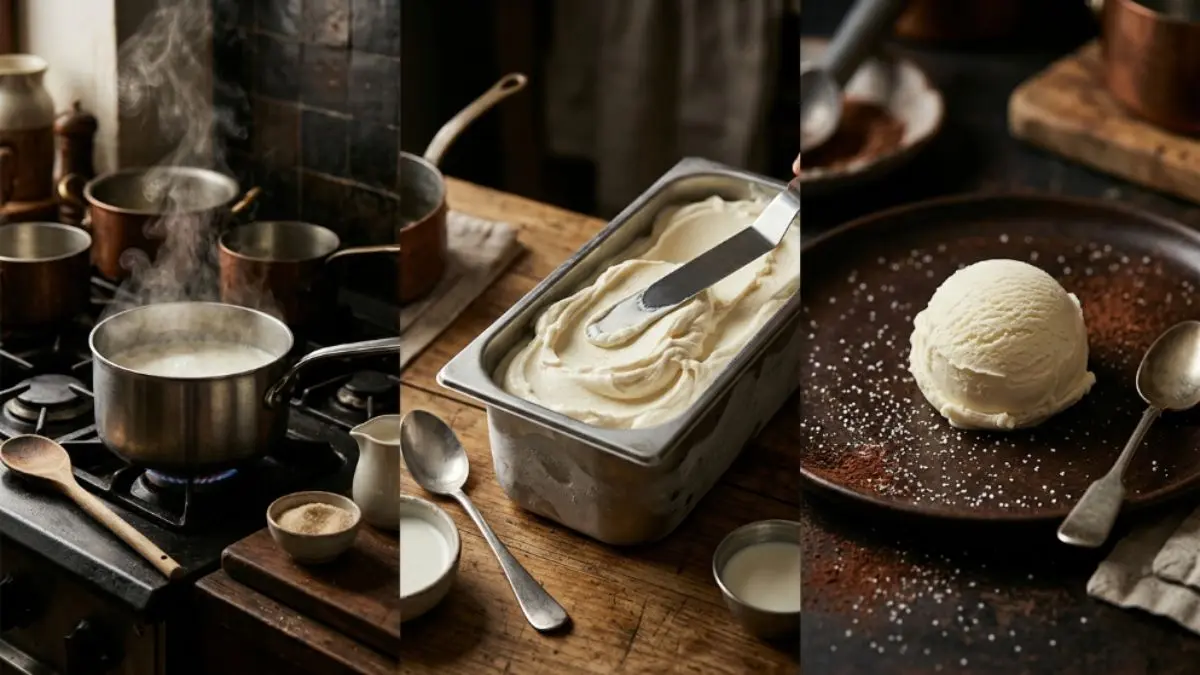
How to Make Gelato at Home: The Complete Step-by-Step Recipe
We will start with fior di latte — the purest, most fundamental gelato flavor, made from nothing but milk, cream, and sugar. Mastering this base gives you the foundation for every other flavor. If your fior di latte is excellent, every gelato you make from it will be excellent.
Fior di Latte Gelato (serves 4–6)
Ingredients:
- 600ml (2.5 cups) whole milk
- 150ml (2/3 cup) heavy cream
- 160g (3/4 cup) granulated sugar
- 30g (3 tablespoons) skim milk powder (optional — improves texture and stability)
- 1 teaspoon pure vanilla extract or one vanilla bean
Method — Step by Step:
- Combine milk, cream, and skim milk powder in a heavy-bottomed saucepan. The milk powder adds protein and helps bind water molecules, reducing ice crystal formation in the final product. Whisk until the powder is fully dissolved before applying any heat.
- Heat the mixture over medium heat, stirring frequently, until it reaches 180°F (82°C). This temperature is important: it pasteurizes the base, dissolves the sugar completely, and slightly denatures the milk proteins, which improves emulsification. Do not boil — bubbling aggressively damages the milk proteins and produces a cooked, flat flavor.
- Remove from heat and add the sugar. Stir until completely dissolved, approximately 2 minutes. Add the vanilla extract or scrape a vanilla bean directly into the warm mixture.
- Strain the mixture through a fine-mesh strainer into a clean bowl to remove any solids. Allow to cool at room temperature for 15 minutes, then cover with plastic wrap pressed directly onto the surface to prevent a skin from forming.
- Refrigerate the base for a minimum of 4 hours, ideally overnight. A thoroughly chilled base churns faster, incorporates air more evenly, and produces a smoother final texture. This step is non-negotiable.
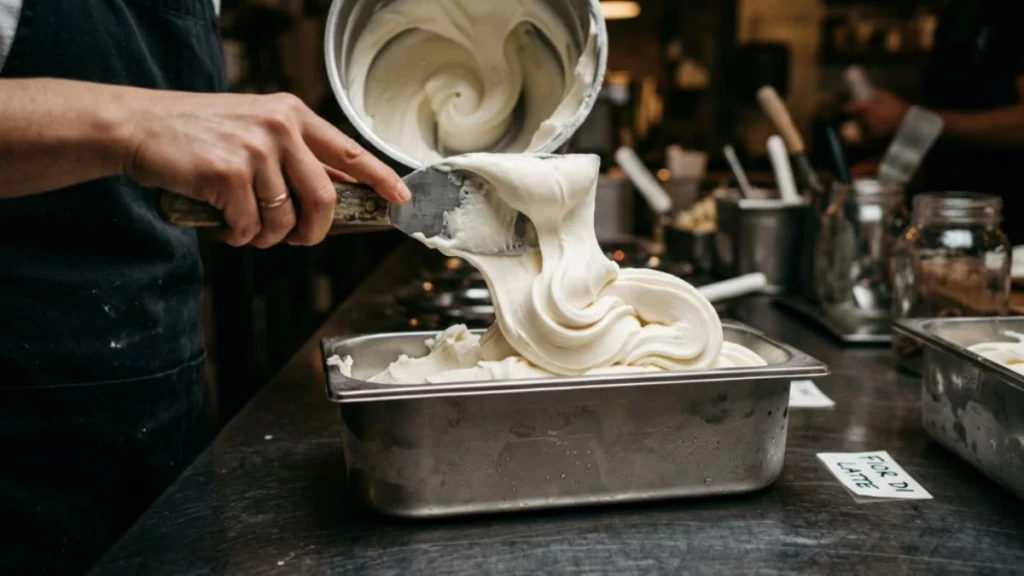
- Churn the chilled base in your ice cream machine following the manufacturer’s instructions, but stop 5 minutes earlier than you would for ice cream. The gelato is ready when it reaches a soft, dense, creamy consistency — not fluffy or airy.
- Transfer immediately to a shallow metal container, press plastic wrap directly onto the surface, cover tightly, and freeze for a minimum of 2 hours before serving. For best texture, serve after 3 to 4 hours in the freezer.
💡 Practical Tip: The plastic wrap pressed onto the surface of the gelato before the lid goes on is one of the most important steps most beginner guides skip. It prevents freezer burn and the formation of ice crystals on the surface, which would make the first scoop unpleasantly icy.
Flavor Variations: From Pistachio to Lemon Sorbetto
Once you have mastered the fior di latte base, the door opens to a wide range of authentic Italian flavors. The base recipe remains largely the same — what changes is the primary flavor ingredient and, in some cases, the ratio of milk to cream. Here is a practical overview of the most popular beginner-friendly flavors.
| Flavor | Base Type | Key Ingredient | Difficulty |
| Fior di latte | Milk base | Whole milk + cream | Beginner |
| Pistachio | Milk base | Pure pistachio paste | Beginner |
| Stracciatella | Milk base | Fior di latte + dark chocolate | Beginner |
| Chocolate | Milk base | Unsweetened cocoa | Beginner |
| Lemon sorbetto | Sorbet base (no dairy) | Fresh lemon juice + zest | Beginner |
| Hazelnut | Milk base | Pure hazelnut paste | Intermediate |
| Tiramisu | Custard base | Egg yolks + mascarpone + espresso | Intermediate |
Pistachio Gelato
Replace the vanilla with 80g of pure, unsweetened pistachio paste, whisked into the warm base before straining. The color of authentic pistachio gelato is a muted, natural green — not the vivid artificial green of low-quality versions. If your gelato is bright green, the paste contains coloring agents, which signals that the flavor will be artificial as well.
Classic Chocolate Gelato
Add 40g of high-quality unsweetened cocoa powder and 60g of dark chocolate (70% or higher), chopped, to the warm milk before heating. The cocoa dissolves into the milk and the chocolate melts completely, producing a deeply flavored, dense chocolate gelato. Using both cocoa and chocolate — rather than one or the other — gives a more complex, layered flavor.
Lemon Sorbetto (Dairy-Free)
Replace the milk and cream with 500ml of water, increase the sugar to 200g, and add the juice of 4 large lemons and the finely grated zest of 2 lemons. Heat the water and sugar until completely dissolved (no need to reach 180°F for a dairy-free base), cool thoroughly, add the lemon juice and zest, then churn. The result is intensely fresh, bright, and naturally dairy-free.
⚠️ Attention: Never add lemon juice to a hot dairy base — the acid will curdle the milk immediately. For dairy-based citrus gelato, add zest only to the warm base, and stir in juice only after the mixture has cooled completely.
The Most Common Mistakes and How to Fix Them
In our experience working with beginners, the same mistakes appear consistently. Knowing them in advance saves an entire batch of gelato — and considerable frustration.
Icy, Grainy Texture
This is the most common problem and almost always has one of three causes: the base was not chilled long enough before churning, the gelato was stored at too low a temperature, or the sugar ratio was too low. Ensure the base chills for at least 4 hours, store at 10–22°F rather than 0°F, and verify your sugar quantities are accurate.
Bland, Flat Flavor
Bland gelato usually means one of two things: artificial flavoring ingredients were used, or the gelato was served too cold. Serve at a warmer temperature and always use pure, high-quality flavor bases. A gelato that tastes underwhelming at 0°F will often taste dramatically better after 5 minutes of tempering on the counter.
Gelato Too Hard to Scoop
This happens when the freezer temperature is too low. Move the container to the refrigerator for 10 minutes before serving, or allow it to sit at room temperature for 5 to 8 minutes. If this is a recurring problem, check your freezer temperature — it may be set colder than necessary.
Gelato Too Soft and Syrupy
Too much sugar or too much cream causes gelato to remain perpetually soft. Reduce sugar by 10 to 15% and replace some of the heavy cream with whole milk. Skim milk powder, as noted in the base recipe, also helps stabilize the texture without adding fat or sweetness.
✓ Best Practice: Keep a simple notebook of your gelato batches — note the exact quantities, churn time, and results. Gelato-making improves dramatically with iteration, and a record of what worked and what did not turns every batch into a learning experience.
Storing Homemade Gelato: How Long It Lasts and How to Keep It Fresh
Homemade gelato does not contain the stabilizers and emulsifiers used in commercial production, which means its shelf life is shorter and its care requirements are slightly different from store-bought products. Understanding storage properly prevents wasted batches and disappointing textures.
Optimal Storage Conditions
Store homemade gelato in a shallow metal container with a tight-fitting lid. Press a layer of plastic wrap directly onto the gelato surface before closing the lid — this double barrier significantly reduces freezer burn and ice crystal formation on the exposed surface. Keep at 10°F to 14°F (-12 to -10°C) if your freezer allows for temperature adjustment.
How Long Does Homemade Gelato Last
Homemade gelato is at its best within the first 24 to 72 hours. After 3 to 5 days, ice crystal formation becomes noticeable and the texture degrades. After 7 days, most homemade gelato is significantly past its prime. This is not a flaw — it is a feature of using real ingredients without artificial stabilizers. Plan batch sizes accordingly, making only what you will consume within a few days.
If you want to extend shelf life slightly, a small addition of skim milk powder (30g per liter of base) helps bind free water and slows crystal formation. Some home cooks also add a tablespoon of light corn syrup, which lowers the freezing point similarly to sugar and improves scoopability after extended freezer time.

Bringing the Gelateria Home
Learning how to make gelato at home is one of those cooking skills that rewards you immediately and continues to develop over time. The first batch teaches you the texture you are aiming for. The second teaches you to trust your thermometer. By the third or fourth, you are adjusting ratios from memory and making flavors you cannot find in any shop.
The key takeaways from everything we have covered: use whole milk as your base and respect the lower fat content that makes gelato what it is. Chill your base thoroughly before churning. Stop churning earlier than you would for ice cream. Store at a slightly warmer freezer temperature. And always use real, high-quality flavor ingredients — pure pastes, fresh citrus, genuine espresso. There are no shortcuts in the flavor department.
Gelato is generous with good technique. It does not require professional equipment, exotic skills, or an Italian grandmother looking over your shoulder — though the last one would certainly help. What it requires is attention, quality ingredients, and the patience to chill your base overnight. Give it those three things, and the rest follows naturally.
Make your first batch this weekend. You will not regret it.
KNOW MORE: The History Behind Tiramisu: Italy’s Most Beloved Dessert
Frequently Asked Questions About DIY Gelato Recipe
Do I need a special machine to make gelato at home?
No. While an ice cream machine produces the smoothest results, authentic gelato can be made using the still-freezing method — pouring the prepared base into a shallow metal container and stirring every 30 minutes as it freezes. The texture will be slightly less refined than machine-churned gelato, but the flavor and density will be genuinely Italian in character.
Why does my homemade gelato turn icy overnight?
Ice crystal formation overnight almost always indicates that the gelato is stored at too low a temperature, or that the base did not contain enough sugar to keep the mixture pliable. Try tempering the gelato for 5 to 8 minutes before serving, and consider adding 10% more sugar to your next batch. Pressing plastic wrap directly onto the surface before storing also makes a significant difference.
How much does it cost to make gelato at home versus buying it?
A batch of homemade fior di latte gelato serving 4 to 6 people costs approximately $4 to $7 in ingredients, depending on milk and cream prices in your area. Quality specialty gelato in American shops typically costs $6 to $10 per serving. The savings are substantial for regular consumption, and the quality of a well-made homemade batch competes favorably with all but the best artisan shops.
Can I make gelato without dairy for a vegan version?
Yes. Coconut milk is the closest approximation to a dairy base in terms of fat content and behavior during churning. Full-fat canned coconut milk produces a gelato with good density and a natural sweetness, though the coconut flavor is present and will influence the final taste. For neutral-flavored vegan gelato, oat milk with added coconut cream produces a more neutral base. Adjust sugar quantities slightly, as plant milks behave differently from whole cow’s milk during freezing.
What is the difference between gelato and sorbetto?
Gelato is dairy-based, using milk and sometimes cream or egg yolks. Sorbetto contains no dairy at all — it is made from fruit juice or puree, sugar, and water. Both are authentic Italian frozen desserts with distinct traditions. Sorbetto is naturally lighter, intensely fruity, and dairy-free, making it suitable for people who cannot consume lactose or animal products.
How do I get the intense green color of authentic pistachio gelato?
You do not — and you should not try. Authentic pistachio gelato made from pure pistachio paste is a muted, grayish-green color, not a vivid bright green. The bright green seen in many commercial versions comes from artificial coloring. If your pistachio gelato is dull and natural-looking, you have used real pistachio paste. That is exactly right.
Can I make gelato with a KitchenAid mixer?
Yes, if you have the ice cream bowl attachment. This attachment works well for gelato — use a lower speed setting than you would for ice cream and stop churning earlier. The gelato should be dense and creamy, not airy or fluffy. Some KitchenAid users also achieve good results by using the mixer to whip a partially frozen base at intervals, similar to the still-freezing method.
Mary Ciss is a food writer and Italian gastronomy enthusiast with a passion for authentic recipes, culinary history, and the stories behind every dish. Through Mio Gelatto, she explores the real flavors of Italy — from centuries-old gelato traditions to the hidden trattorias that locals love. For Mary, every recipe is a journey.